Using custom views in Interface Builder have been traditionally pretty non-eventful. All you would get was a simple white box when you insert your custom view into XCode. XCode 6 brings in a whole new set of capabilities for custom view development. In a similar vein to what you can do in playgrounds, you can develop a custom view in XCode 6 and get immediate visual feedback as you are building your code. I built a simple project which has 2 custom views. You can find the full source code at my github repo. For this project, I decided to build some different versions of the ever so popular SoundCloud waveforms as my custom views. The first one is the familiar rectangular waveform view (WaveformView). The second one is wraps the waveform around a circular path (PolarAreaView). And of course, I picked Swift as my language to build these.
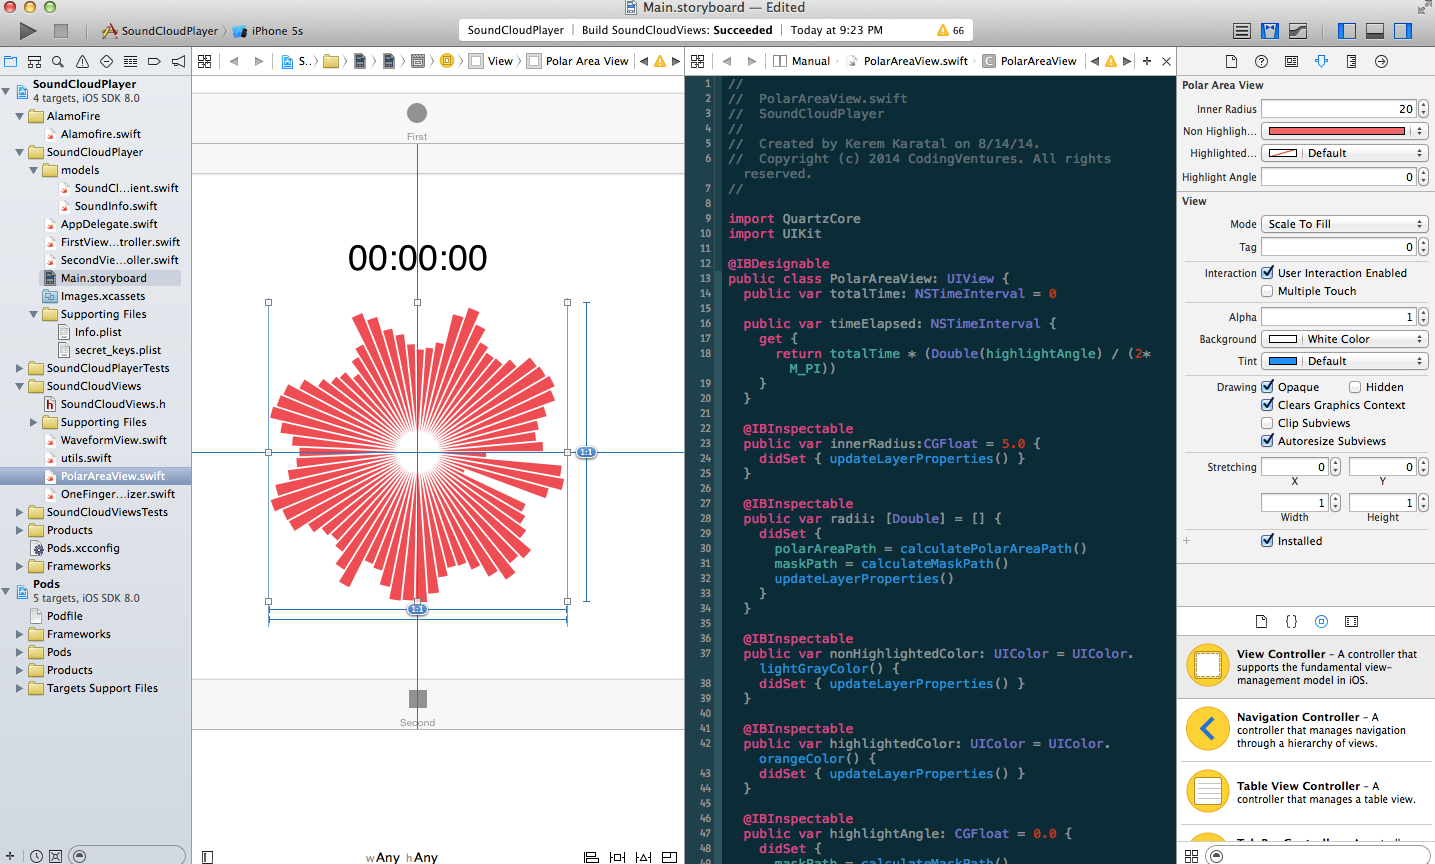
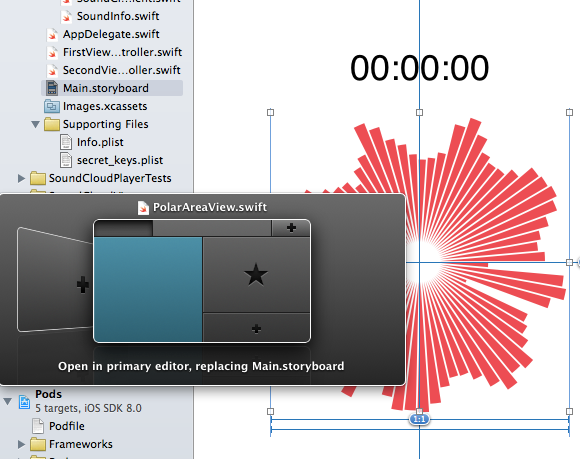
As you can see in the above screenshot, I am showing the custom view in my storyboard layout side by side with the code behind it in the assistance view. If you have enough screen real estate this is the preferred way of building your view. As you modify your code, you will notice that the view will change and adopt to what you are writing in almost realtime. (Almost depending how powerful your Mac is). The trick to open the PolarAreaView in the assistant editor is to use Option+Shift+Click on the file name of the view, which will give you an option to pick where you want to open that file. Then you can pick the assistant editor area to have them display side by side.
There are few things that are noteworthy to mention. First of all, the views need to be created in a custom framework which is also another new feature in iOS 8. This way, XCode 6 can load the framework where the custom view is located, and run it inside the Storyboard to render it.
Second, you need to mark your class as IBDesignable, which will tell XCode 6 that your view can be shown live rendered:
  @IBDesignable
  public class PolarAreaView: UIView {
    ...
  }
Once you add these, the view will start showing up in the storyboard editor as shown in the screenshots. If you look at the screenshot carefully, you will also notice that there are some new custom properties in the rightmost pane under the Polar Area View. These properties are also marked in the code using IBInspectable:
  @IBInspectable
  public var innerRadius:CGFloat = 5.0 {
    didSet { updateLayerProperties() }
  }
  @IBInspectable
  public var nonHighlightedColor: UIColor = UIColor.lightGrayColor() {
    didSet { updateLayerProperties() }
  }
Notice that if the property is of type UIColor, XCode will show a rich color picker. Also note that you would need to implement the didSet callbacks in the properties to update the CALayer properties in order to reflect the changes in the view.
Another thing you may need to do is to implement a method called prepareForInterfaceBuilder. XCode will call this method before the view is shown so that you can provide things like fake data. In the below code, I am providing fake radius values for the PolarAreaView.
  override public func prepareForInterfaceBuilder() {
    super.prepareForInterfaceBuilder()

    radii = [0.32142857142857145,
              0.8285714285714286,
              0.8571428571428571,
              0.7714285714285715]
  }
In terms of the custom views, I used CALayer instead of overriding drawRect which is known to give better performance. The other interesting tidbit is using the mask property with a CAShapeLayer, which provides pretty fast way to display highlighted colors, instead of recreating the paths everytime the gesture recognizer updates the covered/uncovered portion.
Building custom views became a lot of fun in XCode 6!